Step 1
Identify all necessary components:
1. Duffle bag
2. Four poles (two
long gray, one medium gray, one short black)
3. Tent
4. Rain fly
(cover)
Step 2

Drop tailgate to down position.

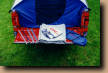
Spread tent out in bed of truck, making sure to have the door face the rear of the truck.
Step 3

Identify all 9 securing straps
3 on the back of
the box

3 on left and right side of the tent.

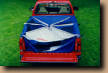
Secure 3 rear straps to bumper.
Step 4

Secure all six straps on the right and left hand side of truck by hooking two under the truck body and one in the wheel well. Tent sides will over lap perimeter of truck bed.
Step 5
Erect all poles to full length. Insert first 3 poles through sleeves, starting with the longest two corner to corner, then the side to side.(Pic 4 of 433) Begin by each inserting pole into the sleeve end closest to truck bed, feeding pole towards the truck cab, making sure to insert pole into corresponding sleeve at mid point.
Step 6

Once the poles are inserted through the sleeves, insert one end of the pole into one of the pockets at the side strap securing points.

Feed poles towards secured end from the unsecured end and insert pole into securing pocket, this will cause the pole to arch and begin erecting the tent.
Step 7
Once all 3 poles have been secured in their opposing pockets, open door to insert the last pole (black pole).

Insert pole between blue and gray portion above tent door.

Locate hollow grommet at top of tent. Feed black pole through grommet, bringing it inside the tent.

Continue feeding pole along tent seam until you can insert it into the pole pocket. Insert other end of pole into pocket at the tip of gray door overhang portion. Secure velcro centering straps to black pole.

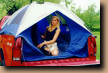
Assembly is complete.
Step 8
Fly installation is optional.
Match location of
logos on tent and fly. Drape fly over tent and secure the six fly guy
hooks to the "D" shaped rings located on top of the six main pole
pockets.